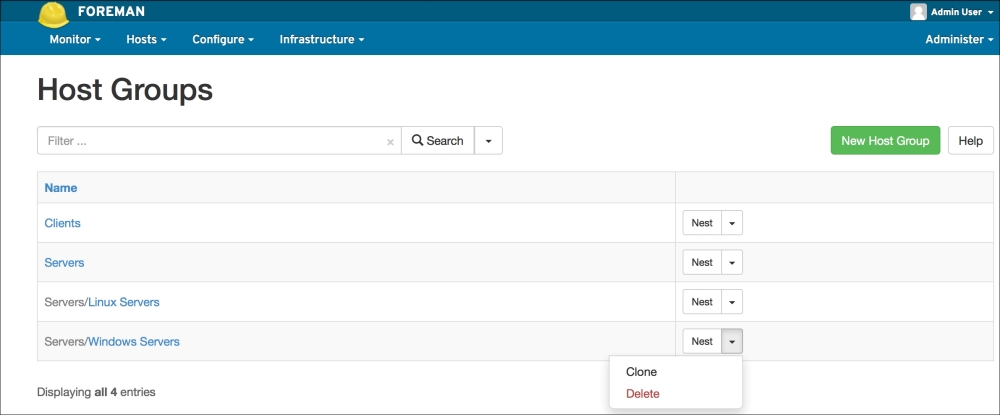
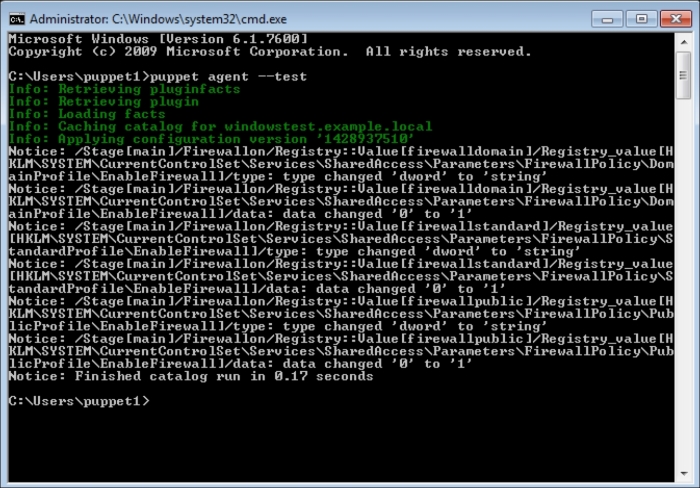
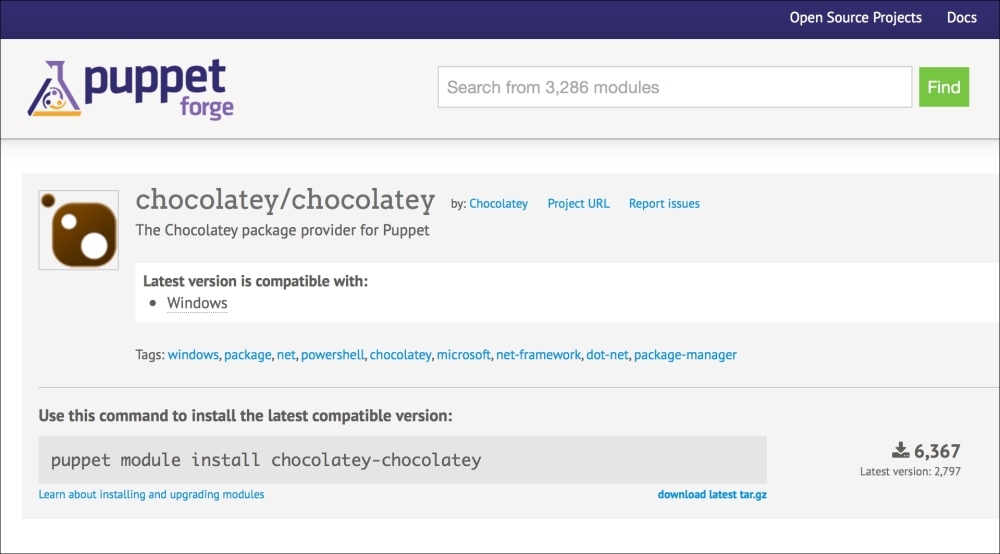
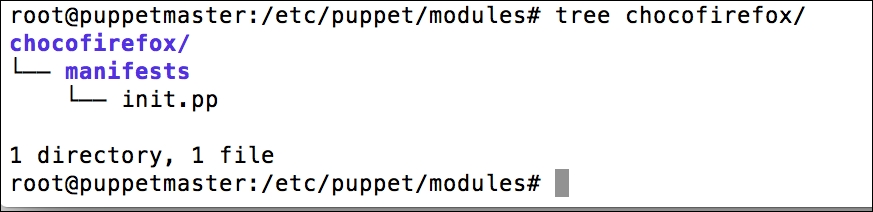
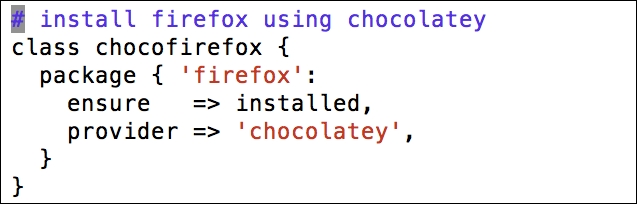
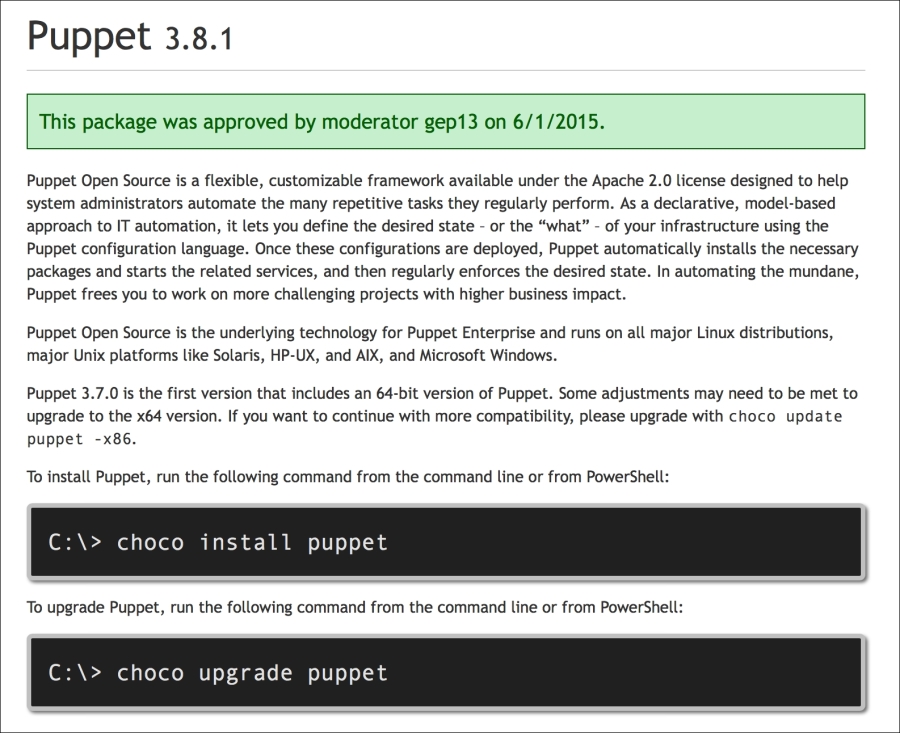
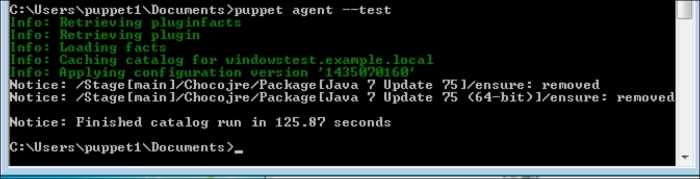
Installing the Puppet agent on multiple clients
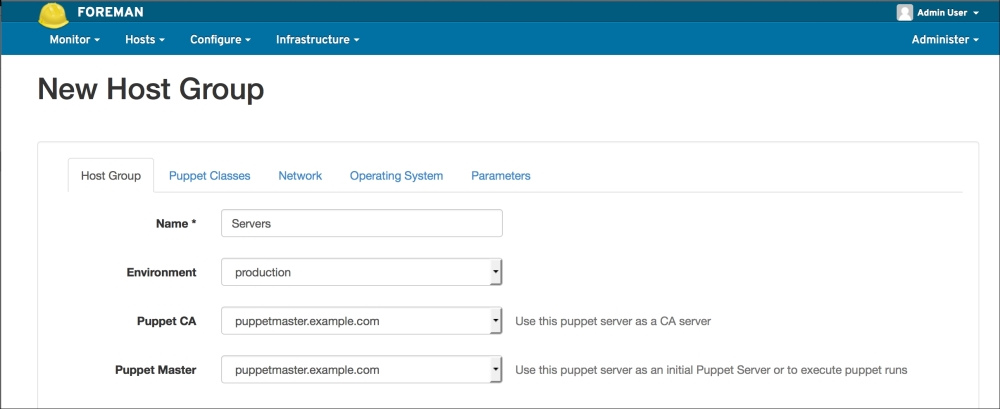
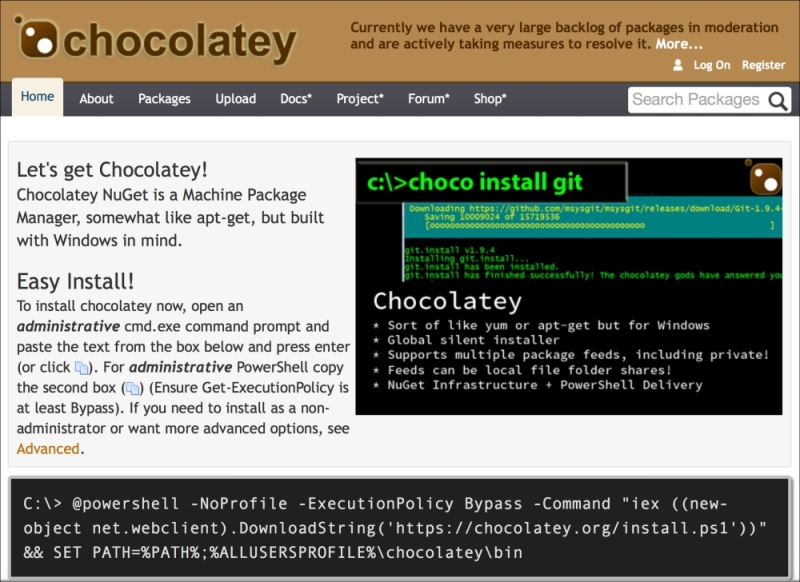
After looking at how to install the Puppet agent on one Windows host, it may occur to you that installing the agent on each host manually will be really cumbersome, if you have hundreds or thousands of hosts. In this section, we will deal with the different options of installing the agent on multiple hosts.
Here are some options, as follows:
You can use third-party software
You can use the domain controller
You can use the Microsoft System Center Configuration Manager
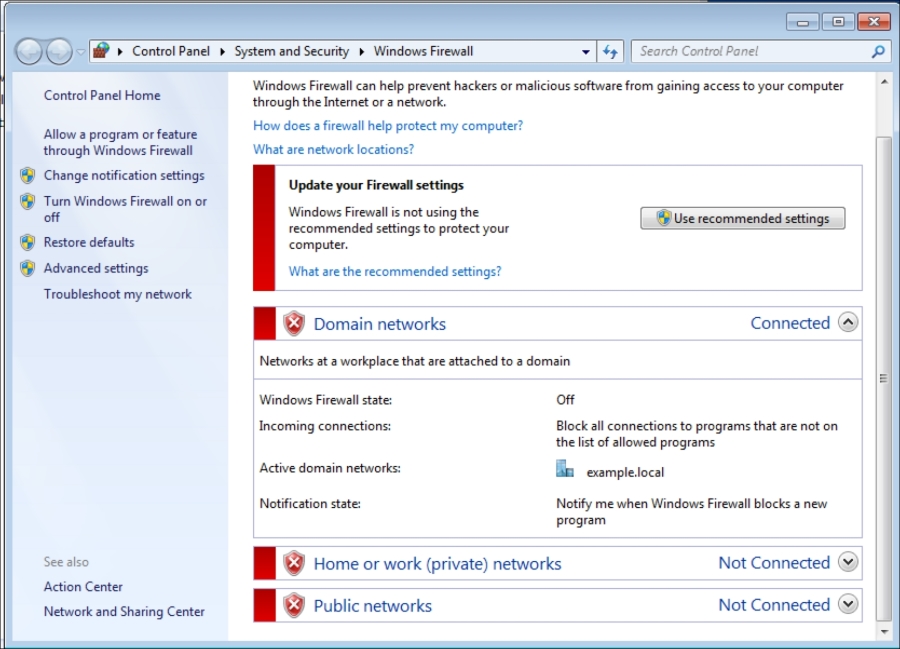
As we are sticking to free tools to get things done, it is hard to find a software that is capable of modifying the MSI settings and sending the installation to multiple hosts. However, if you have a configured MSI file to use, it is reasonable to use a free or shareware software.
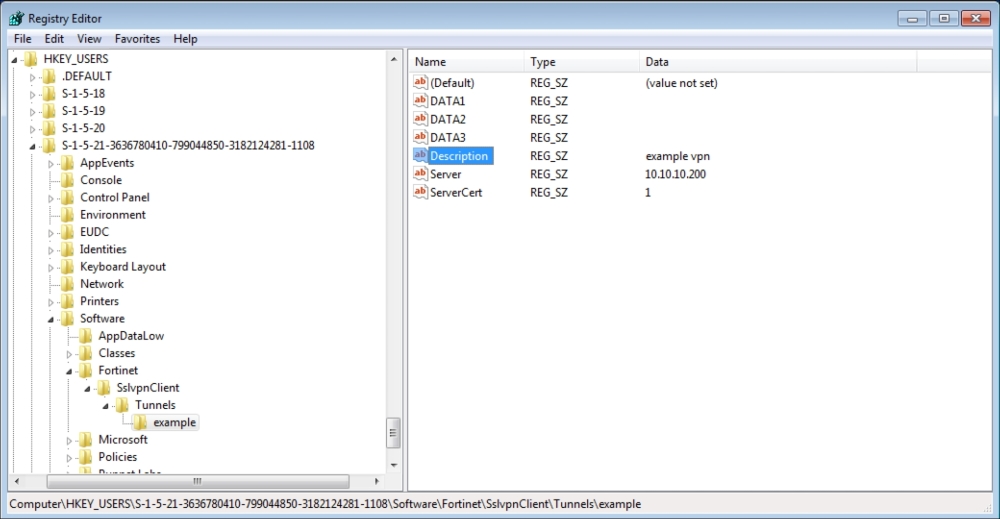
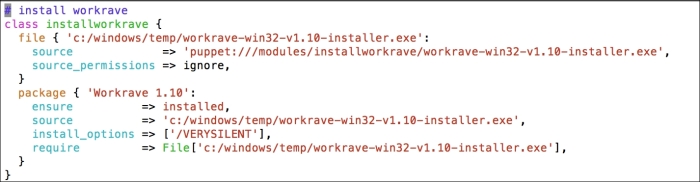
In this section, we will modify the Puppet agent installation MSI, so that it includes the FQDN server. After this, we can silently push the installation and it can run in the background without disturbing the users of the clients and servers.
To change the MSI file of the Puppet agent installation, we will use Orca from Microsoft. To get Orca, we need to install Microsoft Windows SDK for Windows 7 and .NET Framework 4. Go to http://www.microsoft.com/en-us/download/details.aspx?id=8279 and download it. Before installing this SDK, you need to install .NET 4. If you do not have this, the link to download it is http://www.microsoft.com/en-us/download/details.aspx?id=17851.
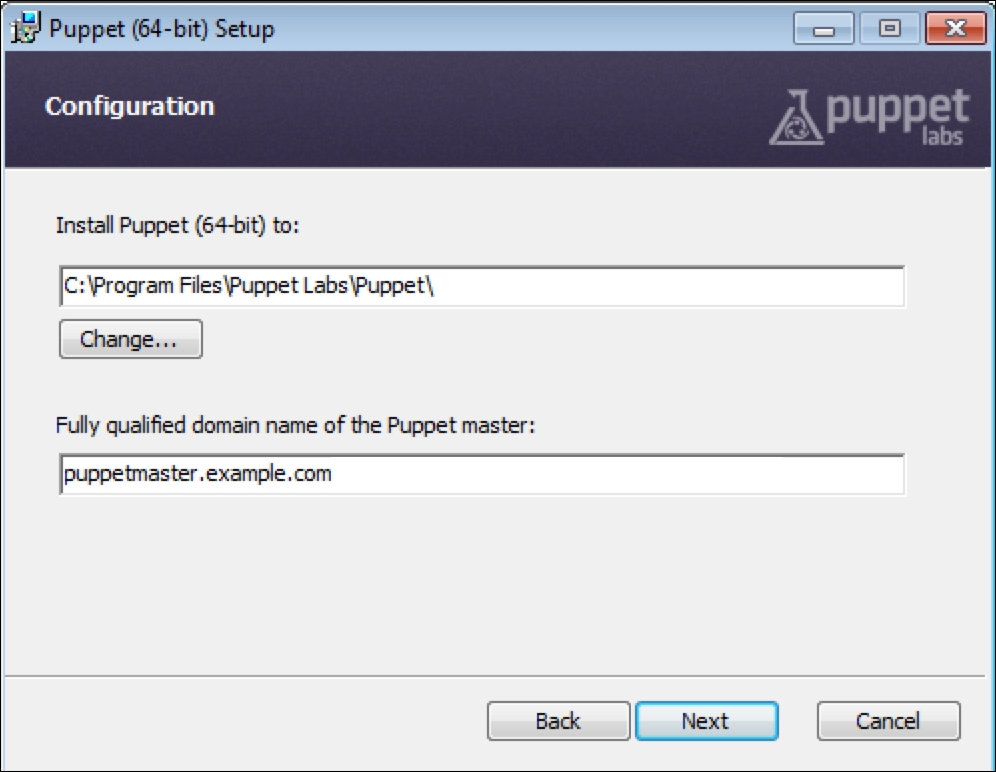
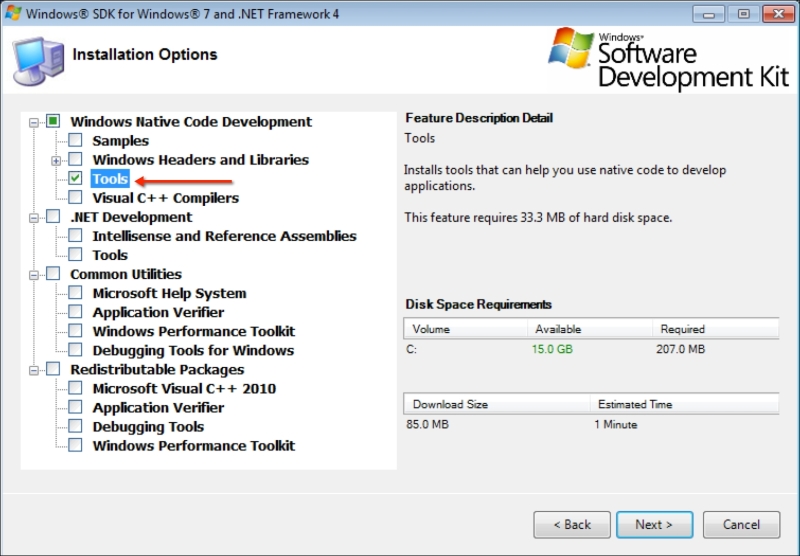
After downloading the SDK, run the winsdk_web.exe file. Use the Next button, until you see the following screen. Just select Tools under Windows Native Code Development and continue the installation:
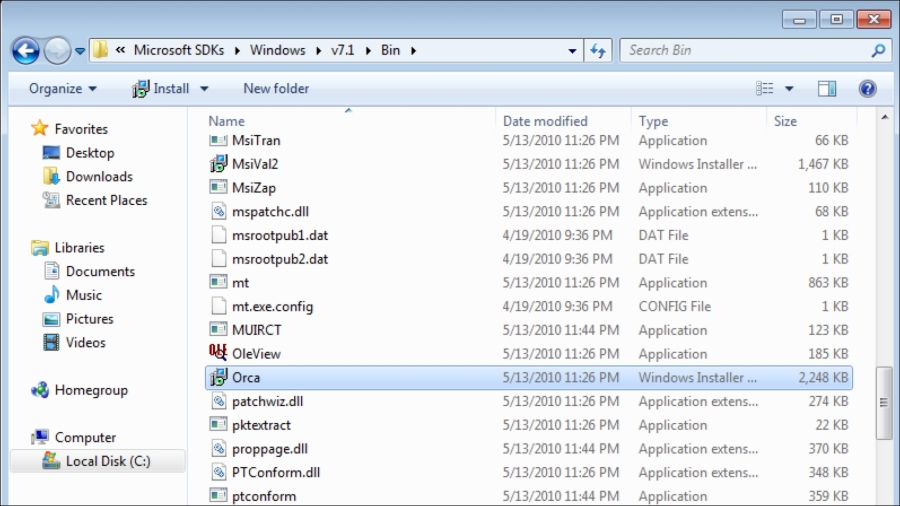
After the installation is complete, go to the C:\Program Files\Microsoft SDKs\Windows\v7.1\Bin folder and find Orca.msi:
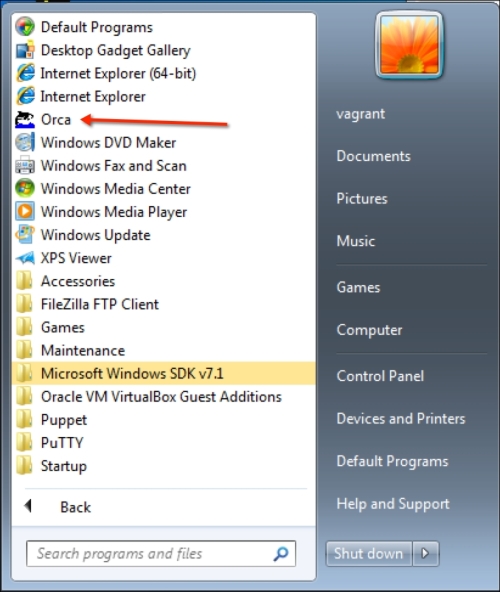
This is the software that we need, to change the MSI file details. Install this software. During installation, when asked, select the Typical installation. When the installation is complete, you will see the Orca link in the Start menu:
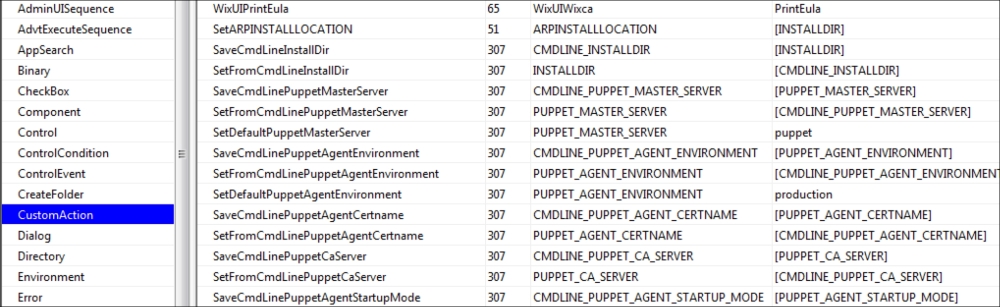
After executing Orca, open the Puppet agent installation MSI file. Select CustomAction on the left-hand side section:
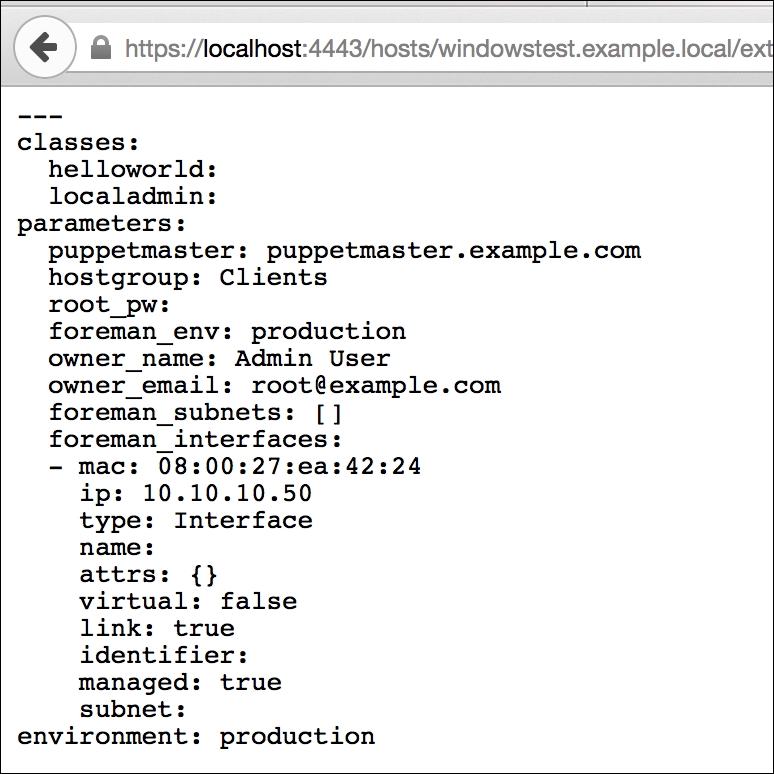
We will change the following three parameters here, and set their values to the Puppet Master FQDN:
SaveCmdLinePuppetMasterServer
SetFromCmdLinePuppetMasterServer
SaveCmdLinePuppetAgentEnvironment
Here are the details after setting the values:
After the changes are complete, we just save the file and exit. Now we have a file with custom installation parameters. This MSI can be used for bulk installations. We can use this with third-party software or with a domain policy to install it on multiple hosts.
Using software to push the agents
After modifying the MSI file according to our needs, the second step is to install it on the clients and servers that we have. We already have the option to install it on one system at a time. However, this is really not desirable and requires a lot of manual work. So, we need to find a way to push the installation.
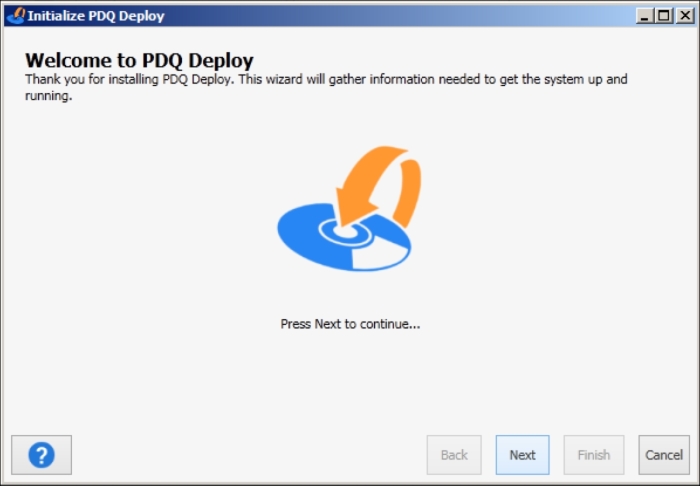
We will use the PDQ Deploy to distribute the agent. The PDQ Deploy has a trial version and is enough for our needs. To download the application, go to http://www.adminarsenal.com/pdq-deploy. This will ask you to fill a short form with your name, surname, e-mail, and, company details. After filling this, you will get the download link. Download the application and install it. It needs .NET 4.0, or above, to run. Even if you don't have .NET, it will be installed. After the PDQ Deploy is installed, run it and it will start with a welcome screen:
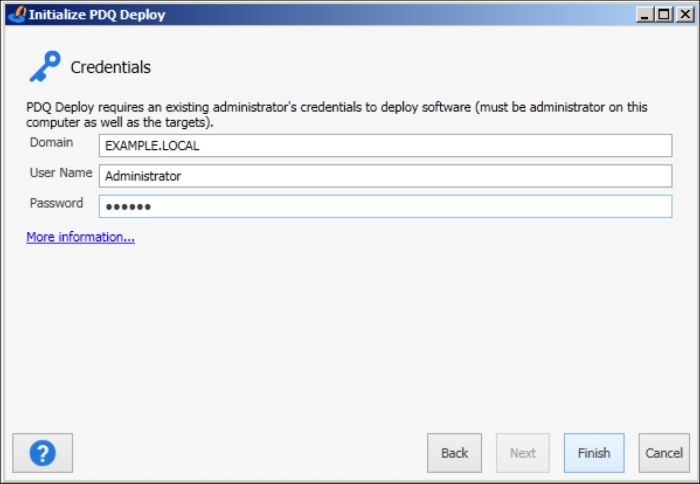
Continue with Next and select Use Free Mode in the next screen. After this, it will ask for credentials:
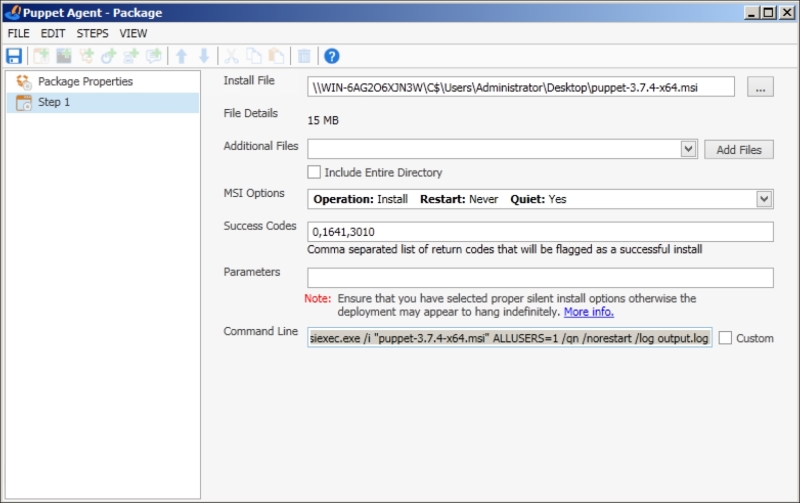
Now, we are on the screen to deploy our agent. Click Create a new Package from this screen:
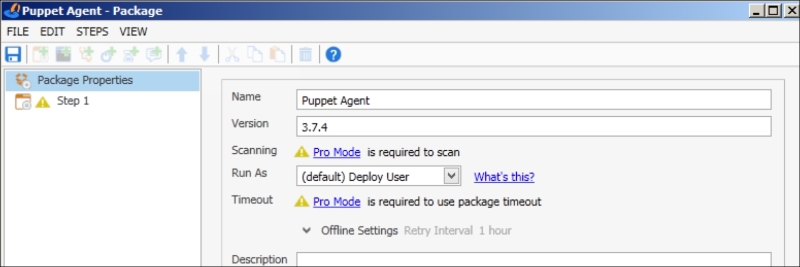
In the package details screen, enter the name as Puppet Agent and the version information for your agent:
After this, go to Step 1 on the left-hand side menu:
First, select the install file. Ensure that the MSI options are as follows:
Operation: Install
Restart: Never
Quiet: Yes
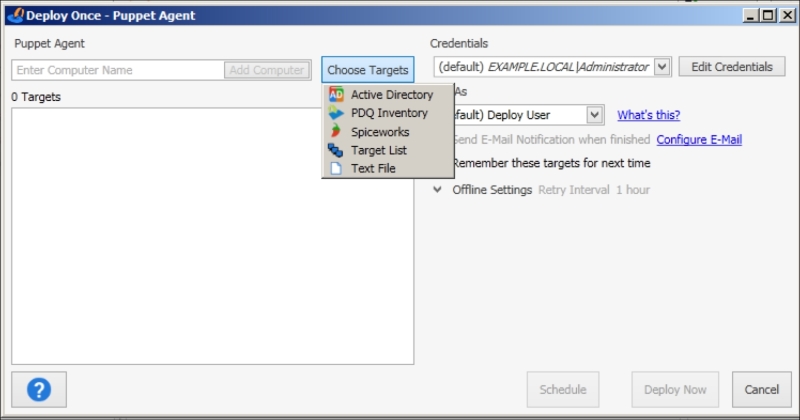
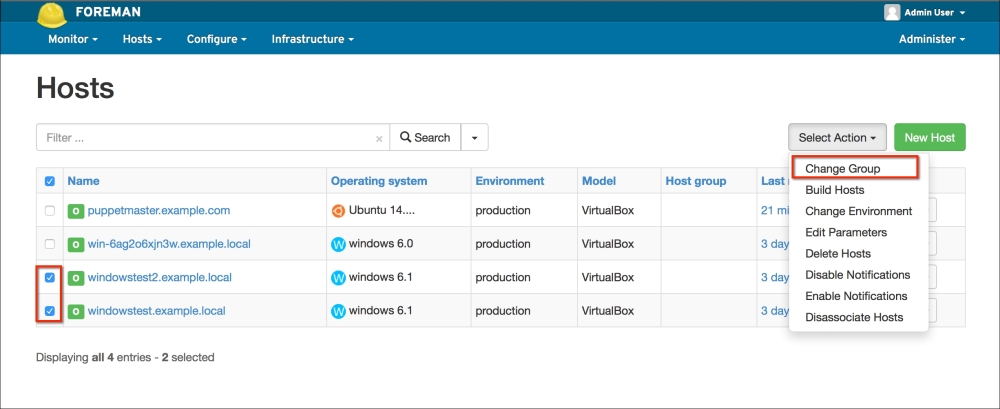
When the details are complete, click the save icon in the top left of the screen. Now you will have a new Puppet Agent package on the screen. Right-click on it and select Deploy Once. In the next screen, we need to select our target computers. There are many options for this. You can select them from Active Directory in your PDQ library (where there is a list of already used computers), from a target list, or even from a text file. Also, you have the option to add the IPs of the hosts one by one:
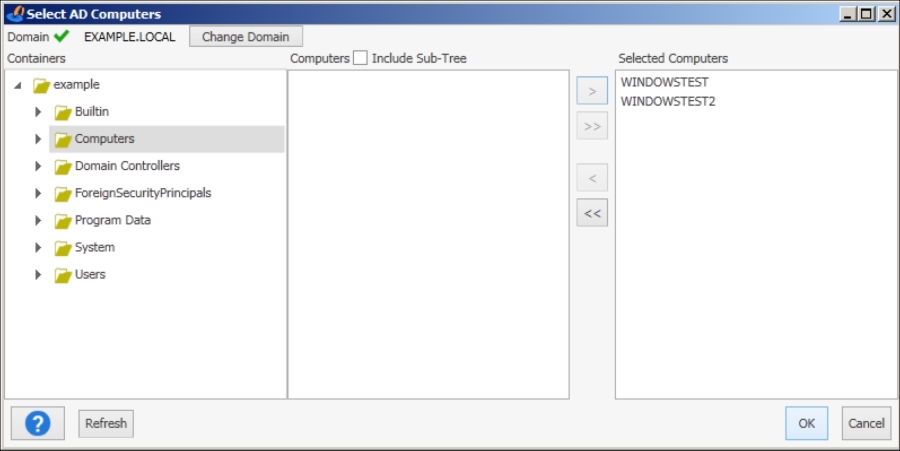
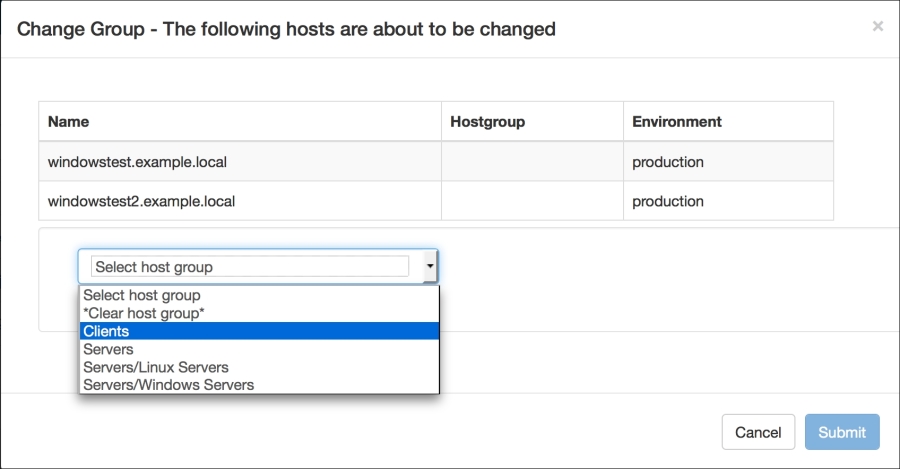
For this example, we will use Active Directory, which fits best to the needs of a Windows system administrator. In the testing environment, there are only two Windows 7 hosts connected to the server and these two will be used as examples:
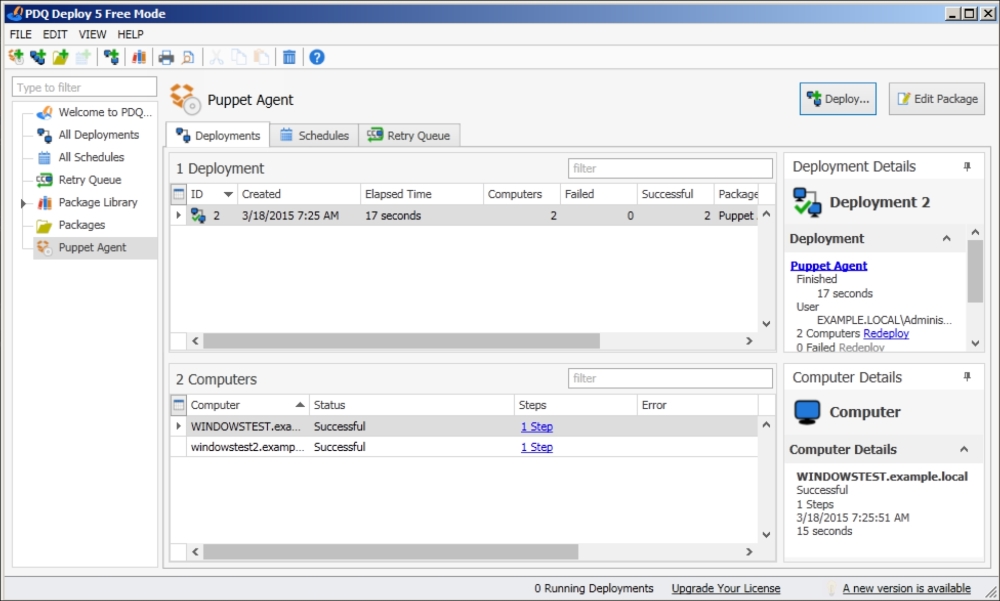
After we are done, we can click Deploy Now and see the progress. As you can see, it provides the list of targets and statuses. The deployment of the two hosts took 17 seconds to run, and then finished successfully:
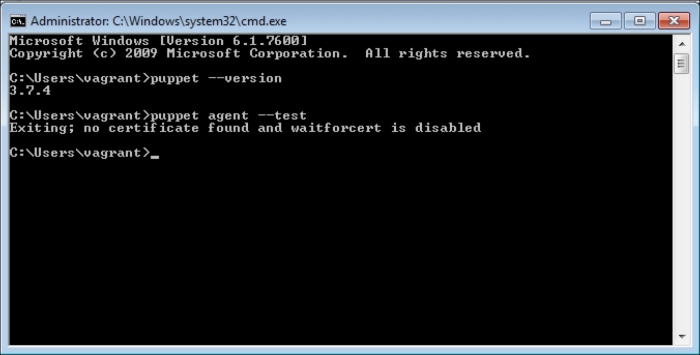
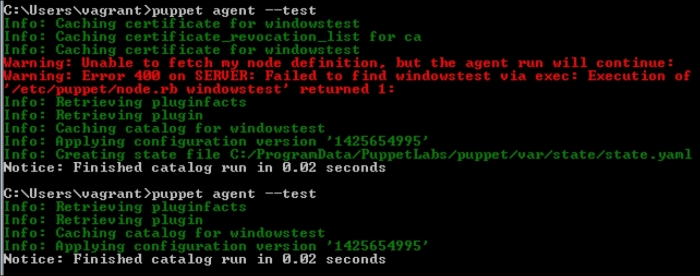
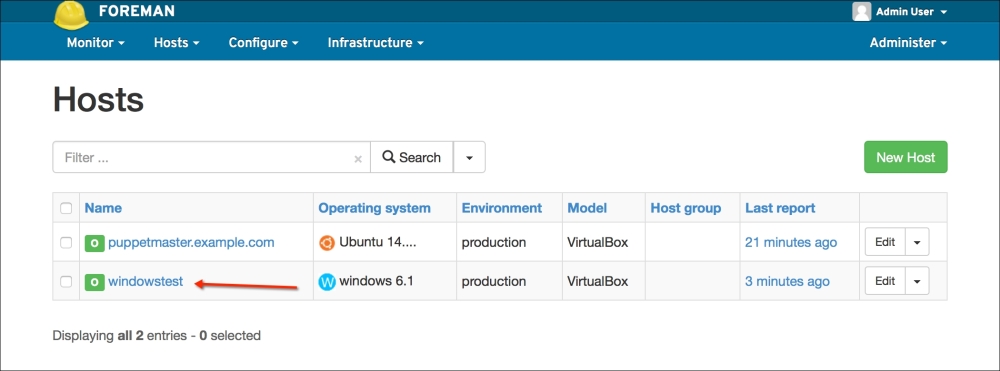
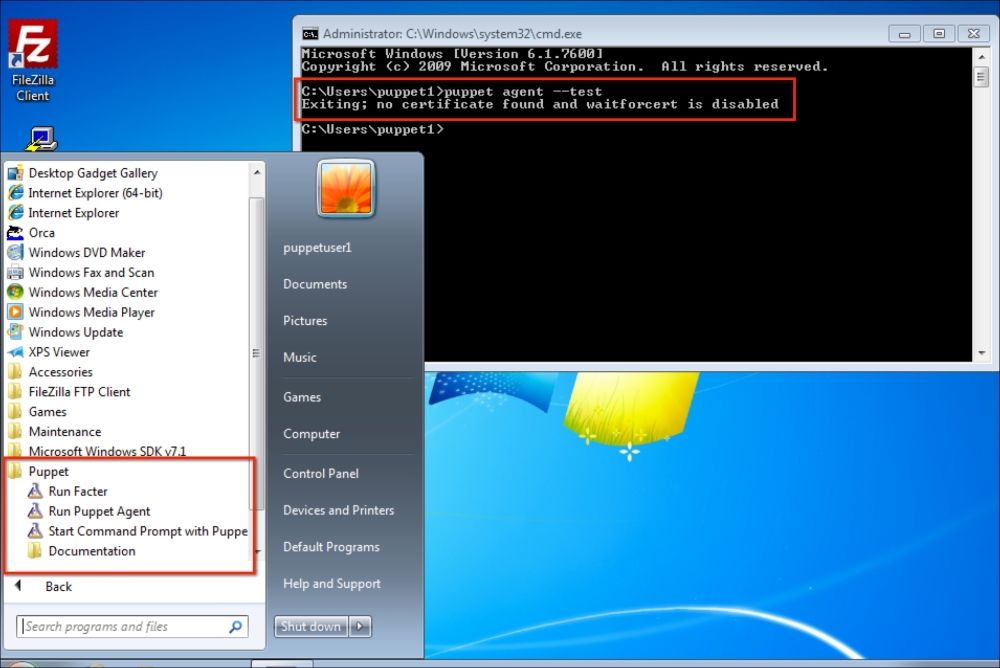
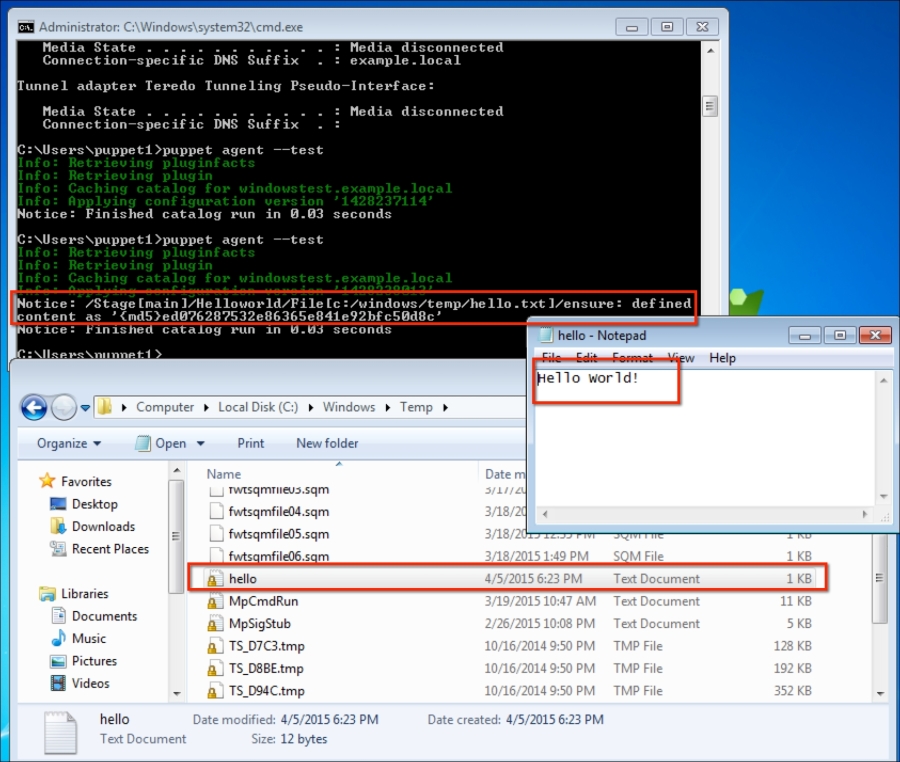
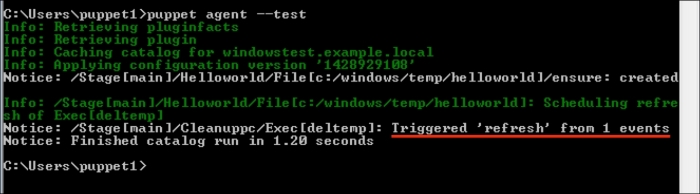
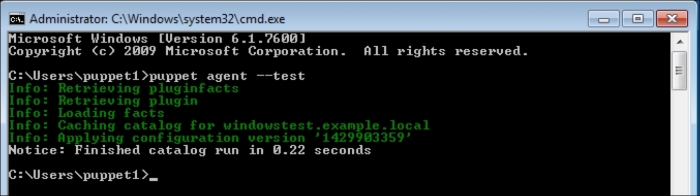
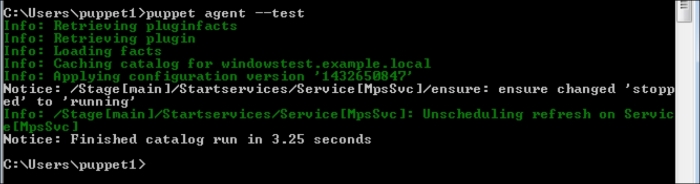
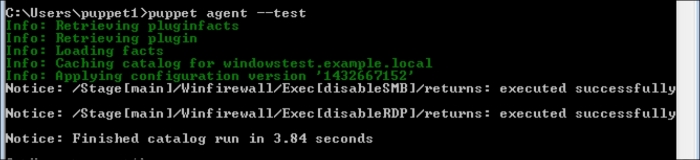
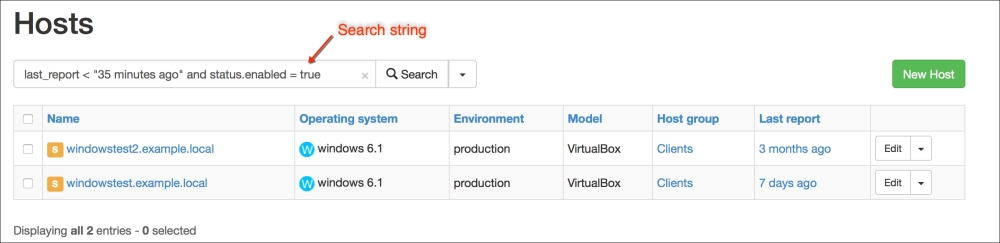
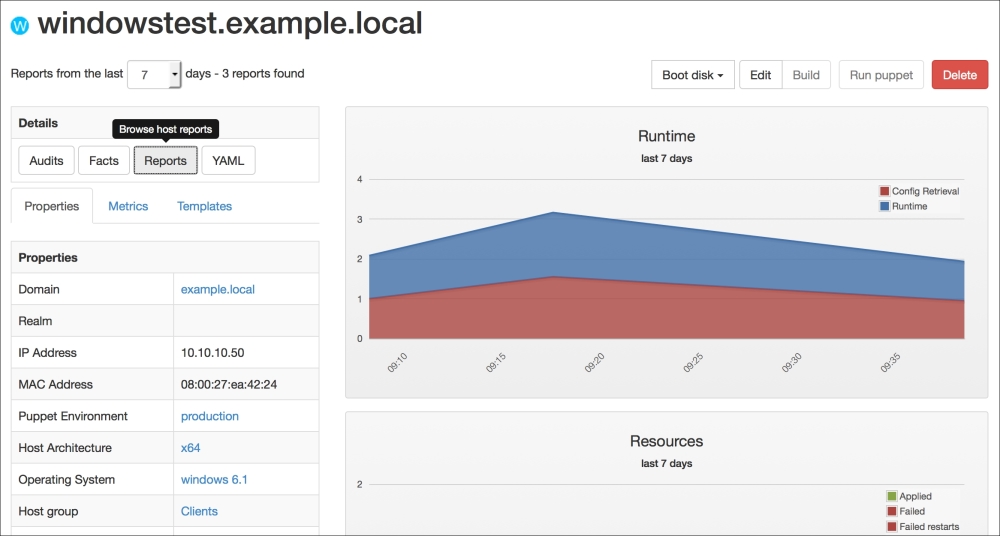
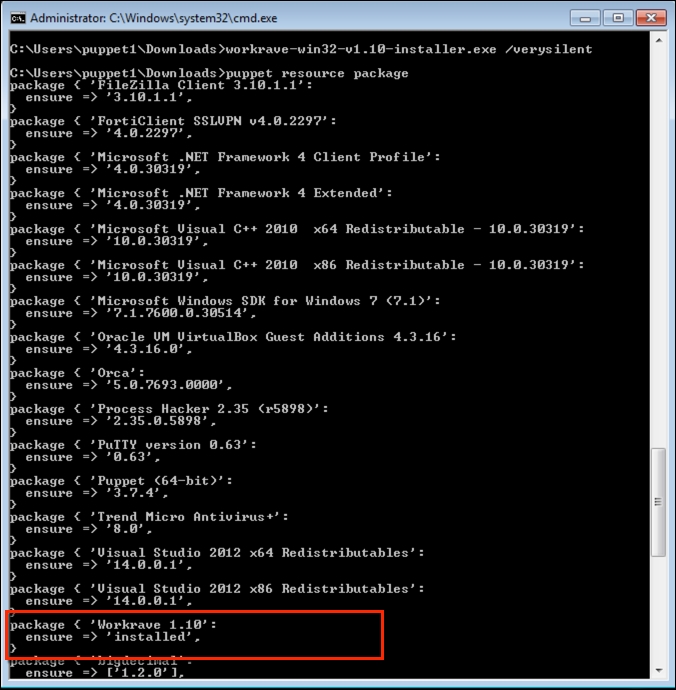
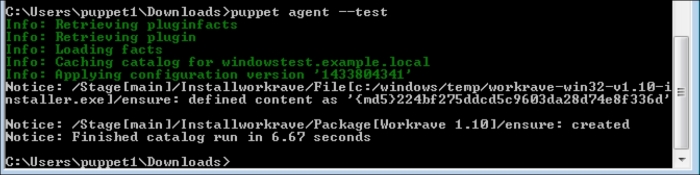
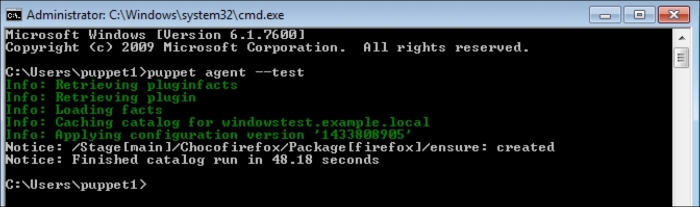
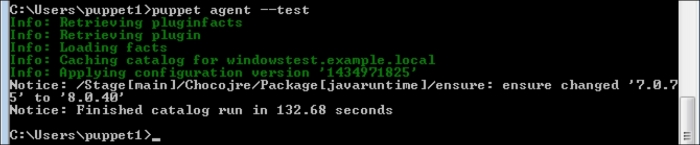
Now, let's check the Windows test host to see whether everything is fine. In the following screenshot, we can see that the installation is successful and there are the details in the Start menu. Also, when we check from the Command Prompt, it can be seen that the host is successfully connected and is waiting for certificate signing. The following screenshot shows the successful installation:
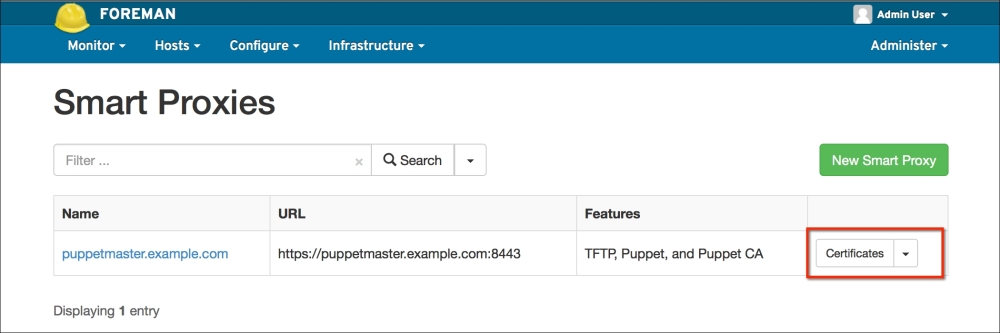
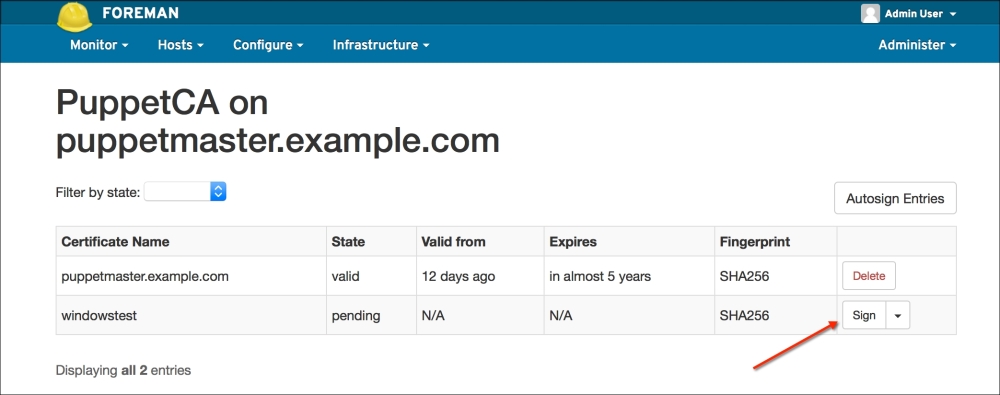
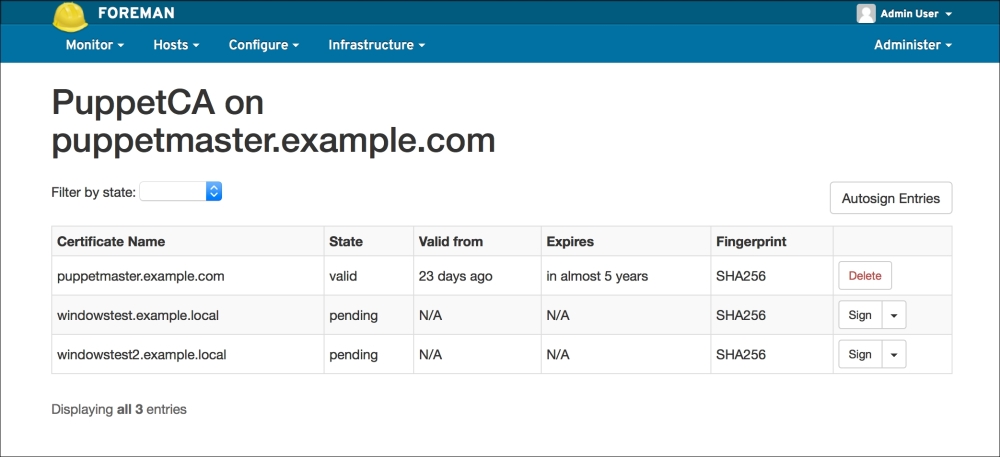
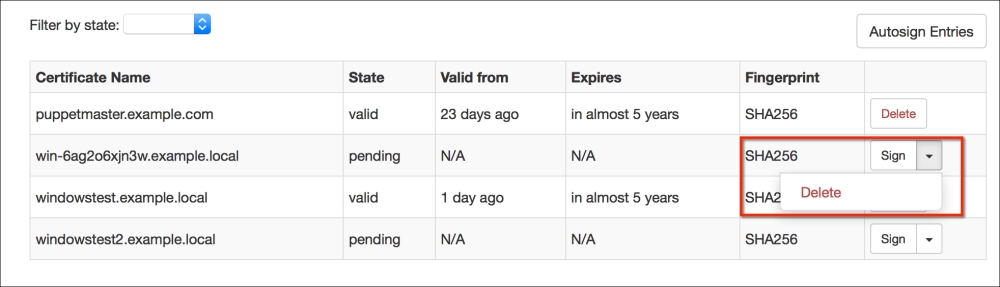
To make sure that the host has connected to the Puppet Master, we can check whether the certificate has been generated. In the certificate details, we can see that the new hosts are waiting to be signed:
With the PDQ Deploy's free version, we can deploy hundreds or thousands of hosts in one shot. It is also good to see the success and failure details. If there are failures, we can handle them manually or try again by focusing on the problematic ones.
Using a domain controller to push the agents
Windows administrators may prefer to install software through a group policy and may not like the option to use third-party tools. So this is our second option. You can use your own preferred method.
We will use our domain controller's group policy to install the MSI package of the Puppet agent on all the domain servers and client computers. First, place your installation file in a folder and share this folder. The sharing needs to have Everyone read rights. We will use the network share link for the group policy, so that the installation file is accessible to everyone.
Here is the share link for this example:
file://WIN-6AG2O6XJN3W/Users/Administrator/Desktop/puppet.
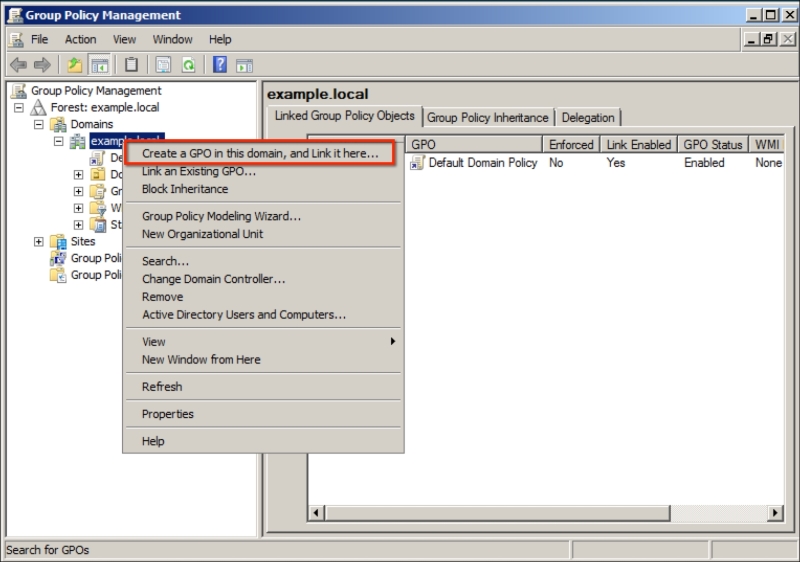
From the Start menu, Administrative Tools, we will run Group Policy Management. Here, you can find your domain name. Right-click on the domain name and select Create a GPO in this domain, and Link it here...:
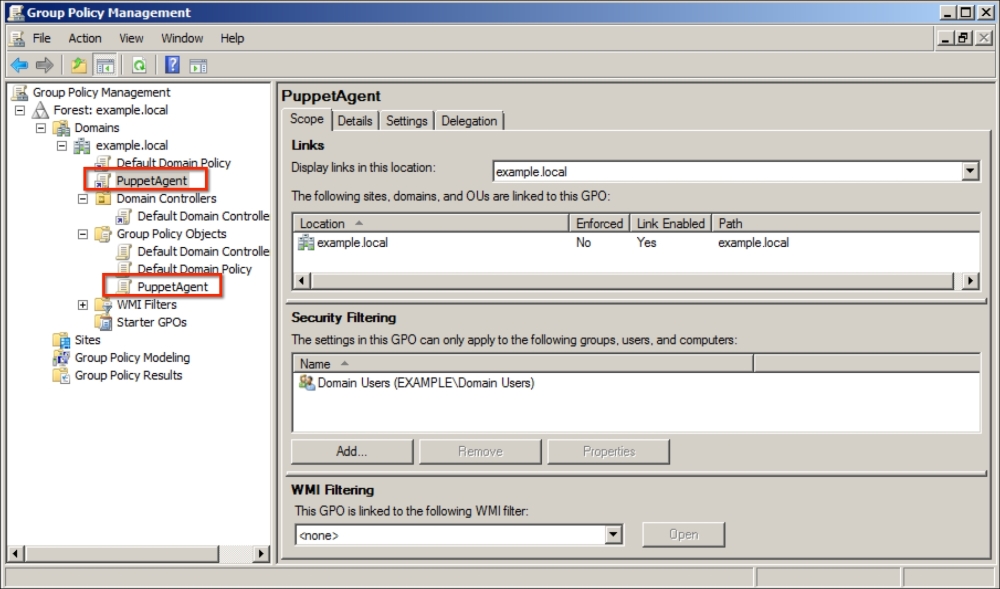
For this example, we will use PuppetAgent as the policy name. After creating the policy object, go to the scope details and add Domain Users, and also, remove Authenticated Users:
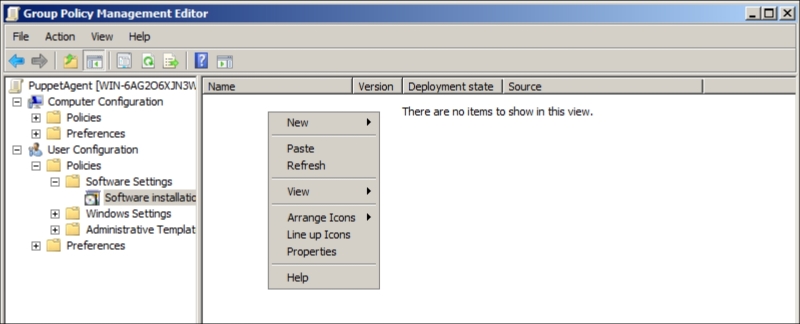
Now, right-click on the PuppetAgent object and select Edit. Here, go to User Configuration | Policies | Software Settings | Software installation. On the right-hand side white space, right-click and select New | Package:
Note
You can select Computer Configuration here, and the agent can be installed on all your computers without any user dependency. However, the installation will be applied after getting the policy and restarting the relevant computers.
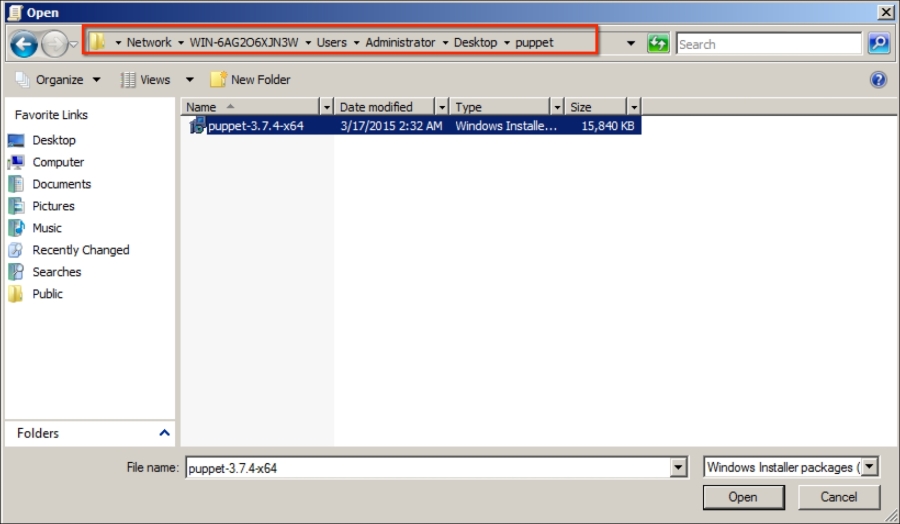
In the new window, we need to select the installation file. We have already created a shared folder, and now we will select it. A shared folder will guarantee that everybody has access to the installation file. In the following screenshot, you can see that the network share is selected:
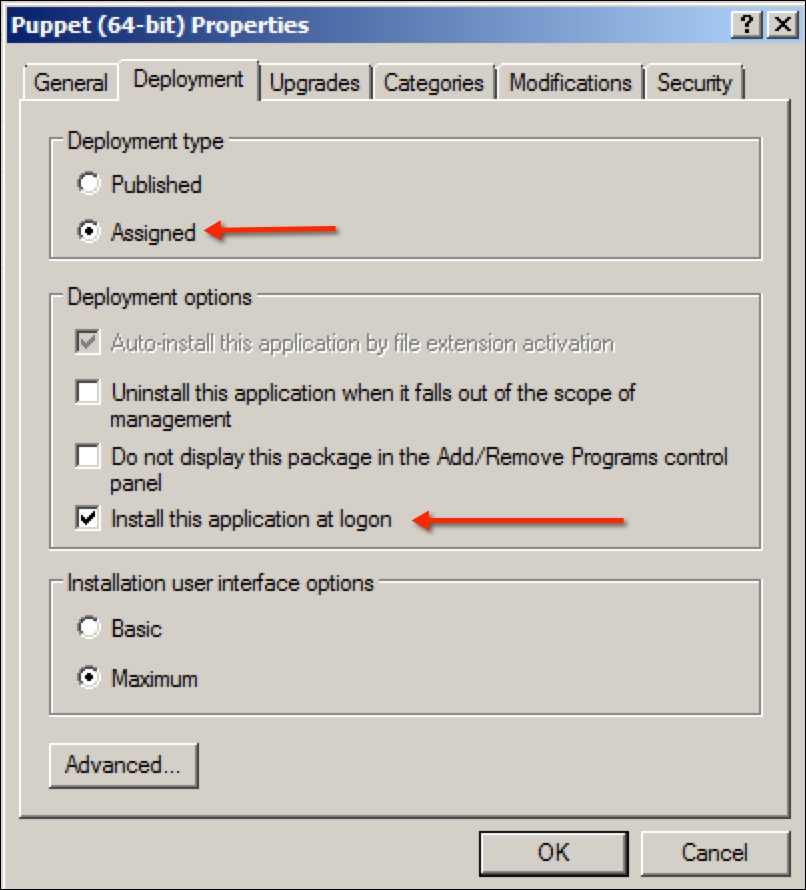
Click Open and in the next window, select the Advanced radio button and click OK. A new window will open. Go to the Advanced tab. Select the Assigned radio button and the Install this application at logon checkbox:
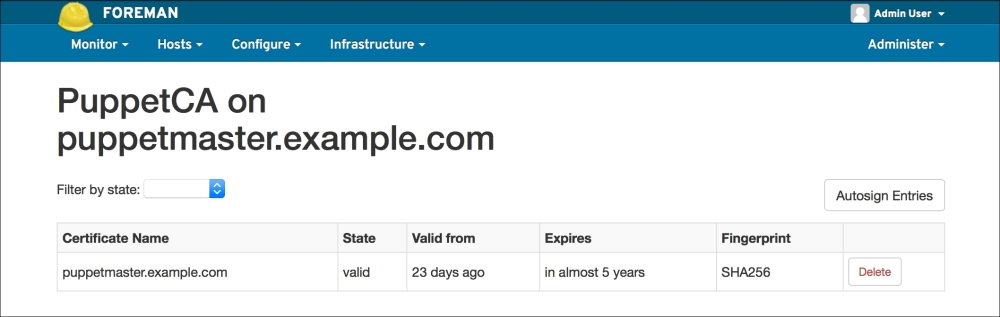
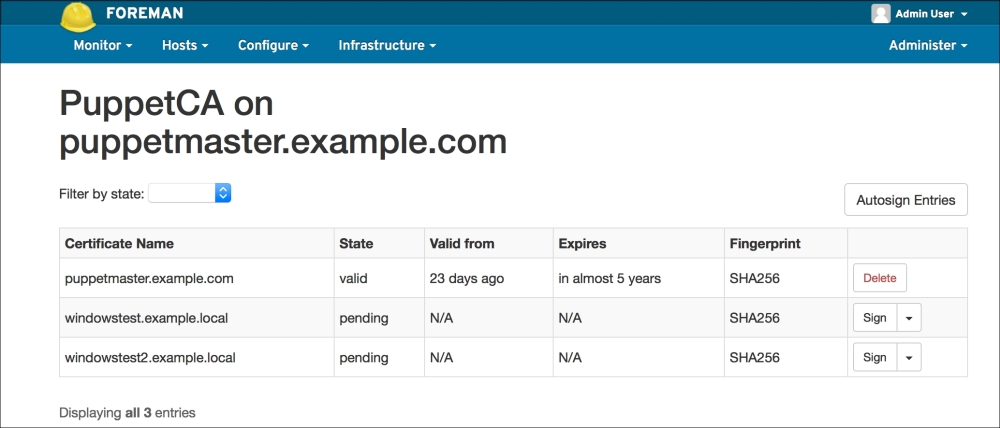
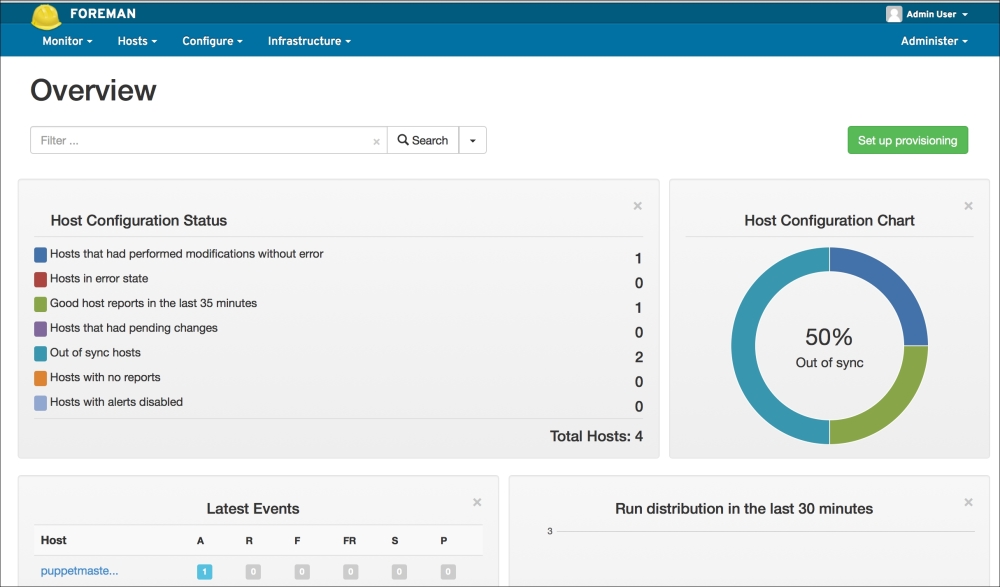
Now we have finished. For the installations to start, first the domain computers have to get the policy. After the policy update, the Puppet agent will be installed at the first logon. The status of the certificates in Foreman will be as shown in the following screenshot. As you can see, we have only one host and that is, Puppet Master (the previous configurations and certificates are removed for testing purposes):
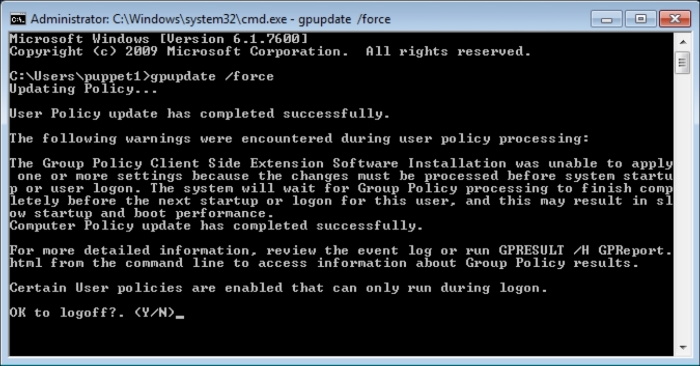
To verify whether the configuration was successful and to make it quicker, we will manually make a policy update. To update the policy, manually run the following command in the Command Prompt of Windows. gpupdate is used for the group policy update. The force parameter forces for an update:
The policy update shows a warning that there is an update that will be implemented after logoff and logon. We will answer this with Y:
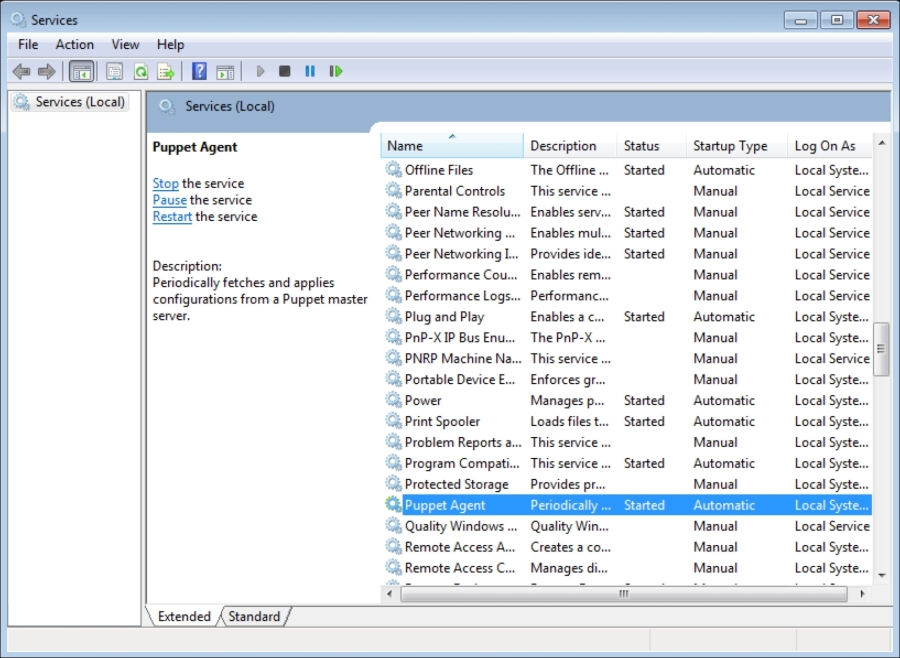
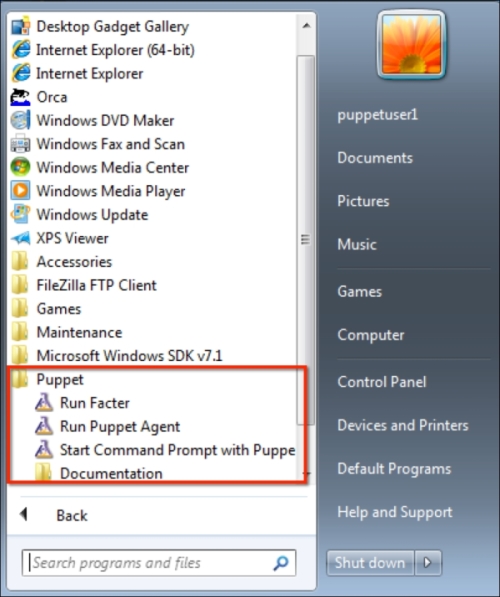
After logon, let's check whether the Puppet agent is installed. As you can see from the Start menu, it has been successfully installed:
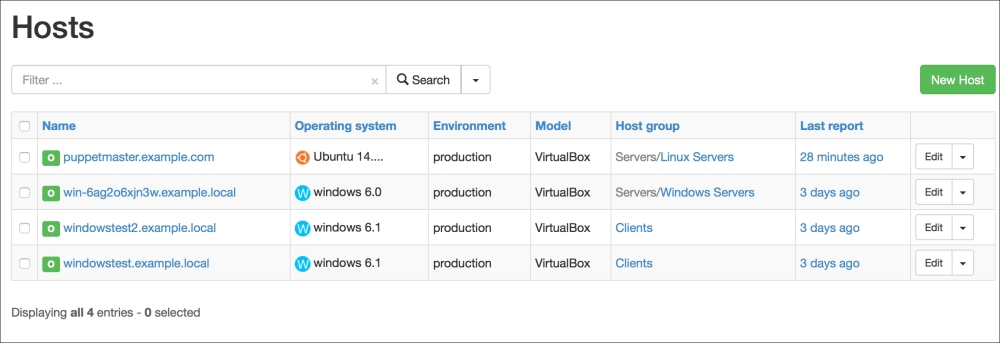
We are done with the windowstest host. Now, let's just restart windowstest2 to verify whether it also gets the policy and installs the agent. After restarting, try logging in to windowstest2 and check whether the agent shows that the installation was again successful.
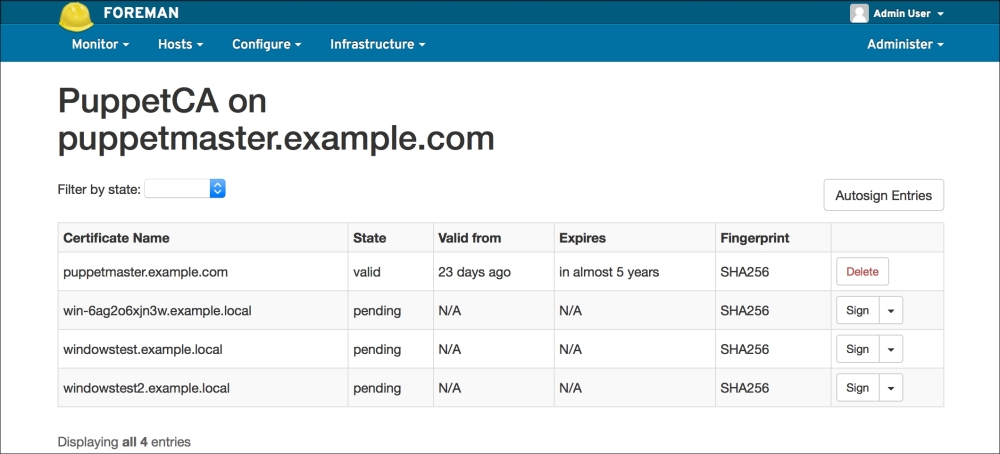
Our last step is to check Foreman for the certificates. As you can see in the following screenshot, this step was also successful. Here, we only need to sign the certificates as the last step: